


Portfolio
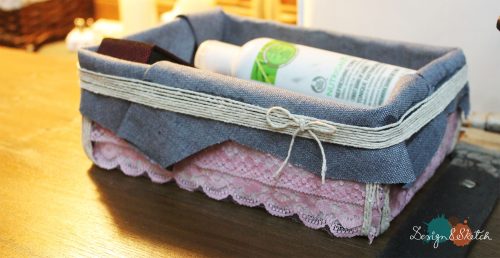
DIY your own make up/ storage box!
Storage crisis is one emergency that we all have to deal with. No matter how much furniture you buy or shelves you clean out, there will always come one day when you will run out of space again. And when items don’t have their own place to stay in, it can get really hard to avoid a messy house.
Recently I bought some skincare products that did not fit into my makeup drawer. I was running out of space and they just ended up making a huge clutter on my table anyway. I had to store them together somewhere, but I did not find anything that was specific to my purpose. I clearly did not have space or money for new furniture items, so I decided to make a pretty makeup storage box where I could keep all my newly- bought products in.
This box was actually quite easy to make, and the time I took was about 5-6 hours. Sure, it might look like a lot of time if you are a busy bee, but this kind of small DIY project could be really a lot of fun to do during the weekends. So here is how you can make a box like this:
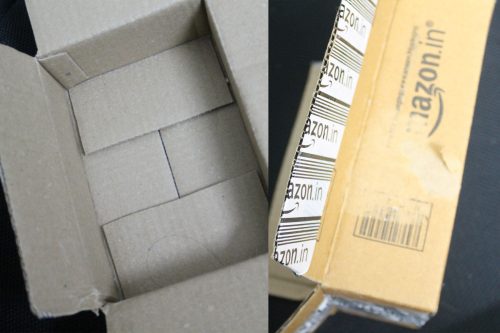
Start with a cardboard box. It could be anything- even delivery boxes would do! Just choose the one that is big enough for the items you that want to store, and strip away the plastic or any other paper that could be stuck to it.
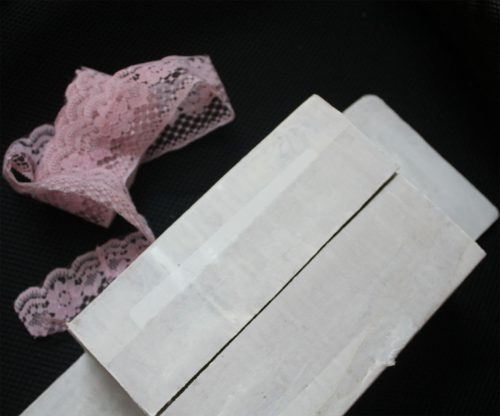
Paint the whole box with white gesso. Gesso is a primer that sticks to any surface you apply it on, and it makes any paint you put on it longer lasting. However, I used the gesso only to make the surface matt white. I wanted to paste strips of the pink ribbon on the painted box, so the white gesso was a good choice to begin with. Instead of gesso, you can use any white paint you prefer. However, this is where you can have some fun and use any colours you want. You can also not paint it but let the natural colour of the box show through the net of the ribbon instead.
For the ribbon, use something broad and with weaves in it. This will let the colour underneath show, and will also add a shabby chic charm to the overall look of the box. 🙂
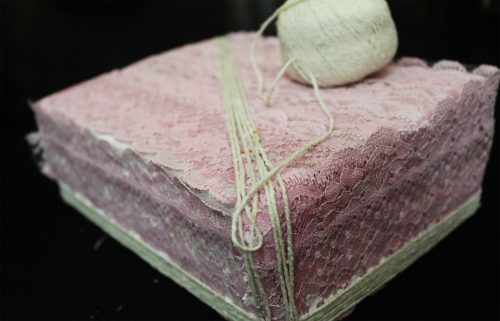
Now get a rope. Any thin rope would do. I got mine in one of the shops at Gariahat, so if you are in Kolkata, West Bengal, you can head there and get this exact rope. However, you can use anything you have available in your local art store- even ribbons of matching colours would do!
Put some glue on the corners of the box where the edges of the ribbon strips meet. Line the rope up and attach it to the glued portions and this way you will be able to cover up the edges of the ribbons as well. Once you have gotten a look that you like, you can cut off the excess rope and let the box sit for a while for the glue to dry.
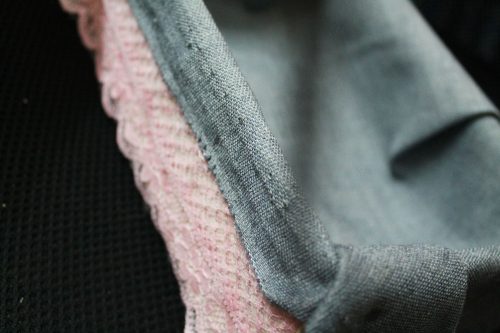
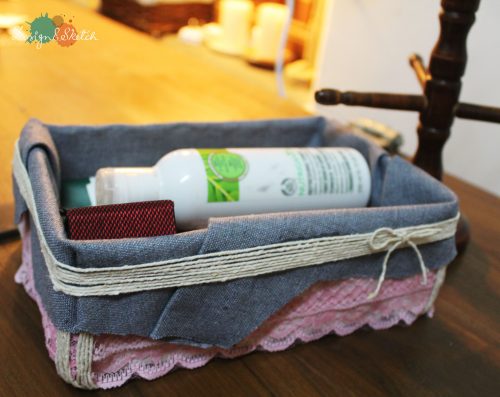
Now it is time for the next challenge. This can test your patience a bit, so make sure you stay calm while doing it. 🙂 Take any beautiful fabric piece you have ( I had some ‘jeans’ cloth left in my crafting supplies) and cut it down to size. Remember that you want the edges to go over, so make sure you cut it with enough fabric to cover parts of the four sides of the box on the outside.
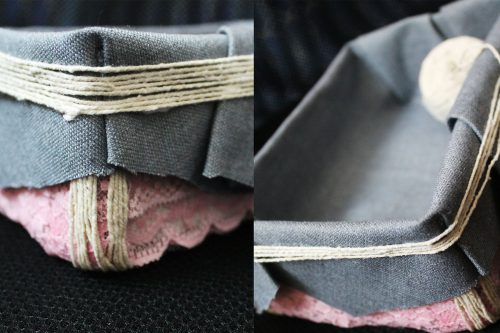
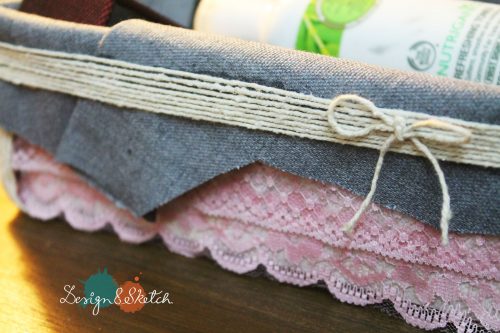
I did not want a clean edge for the sides of the fabric, and I wanted to create folds. This makes the process quicker as well because you do not have to take the time to measure and cut. Just add some PVA glue on the insides of the box so that the fabric can stick to them and then simply fold the fabric outside and glue it to the sides. After that, I glued more rope on top of the fabric and that gave the box a cute, neat look! 🙂
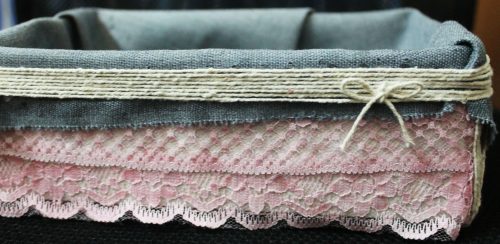
Finally, take some more thread and cut it up into small bits that you can make two bow tie with. Attach them to the sides or the middle (anywhere you like) and you are done!
Comment >>Framed Photograph on Card for Love birds
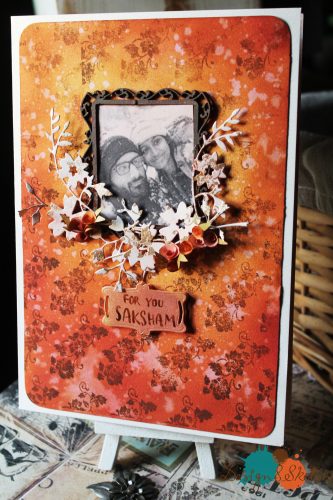
Pamela Sadhukhan wanted to surprise her special friend with thoughtful gifts and a special card for his birthday. She wanted something designed with a look quite similar to my “Woman in frame” card which I had made some months ago.
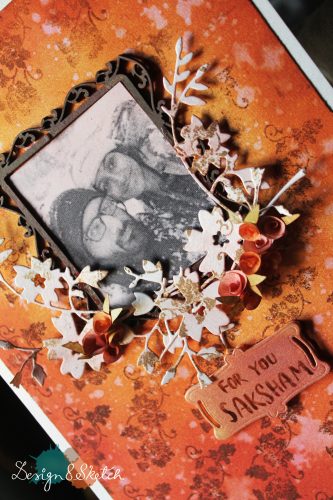
So I asked her for a lovely pic of her and her boyfriend, which I then photoshopped and printed in a monochrome so that it matched the overall tone of the card. I used a strong, 250 gsm card for the base, and framed the picture with a cardboard cutout on top. I painted the top with red and orange inks and acrylics, while adding hand cut and handmade flowers and leaves as flourishes to make the card look more unique. I also added the letters, “For you, Saksham” on Pamela’s request.
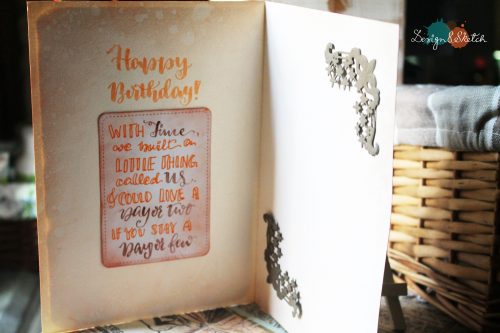
Inside the card, Pamela wanted me to brush letter a special message for her boyfriend, and also attach a frame so that she could insert a special photograph. The card has been customised to her liking, and every single aspect of it tells a story of the wonderful couple who are very much in love.
If you want to send a personalised card for a special someone with your message brush lettered, please contact me.
Comment >>Handmade notebooks with open binding


Recently I got an order from a client to make some handmade notebooks as gifts for their friends. These notebooks have been customised to match the personal requirements of each recipient, and they have been handmade with love and care.
These two notebooks are quite different from the ones I have made so far. Not only have I used handmade paper created from cotton rags this time, but the stitches and binding are open for all to see. 🙂 The handmade paper is completely acid and lignin free, which means that inks will last on the paper for a long time.
One notebook bears a water colour illustration and brush lettered title “Ballad Nocturne” which is sewn into the fabric cover. The gear on the side allows the writer to keep the cord in place, thereby keeping the notebook close when not in use.
The other notebook has a hard cover covered in handmade paper created from banana plant fiber. It is gorgeous and quite strong; you won’t be able to tear this easily. The front cover contains a metal leaf and flower ornament which is connected to a chain and clasp. The edge of the back cover contains a ring to which you can attach the clasp, thereby keeping the book close.
These notebooks are one of a kind; they are perfect to pen down your thoughts in, your poetry and personal stories. If you want to custom order one for yourself or someone special to you, please contact me.
Comment >>Little Birdies Notebook Set


I was contacted by Hridesh because he wanted to send a gift to someone special for Rakhi. He wanted me to create a notebook for her, inspired by the concept of birds and nest.
I decided to create a set of 3 notebooks which can be strapped within a strong cover made of chipboard. The straps are elastic bands with colours that match the overall theme of the set. I painted the entire cover with light watercolours and sketched images of birds and birdhouse. Upon request, I also added brush lettered name ‘Sini’ for whom the gift the intended.
The notebooks contain blank pages which are 120 gsm thick, and their edges have been distressed to give them a more handmade appearance. Each of the notebook has a cover of 300 gsm, and bears a hand sketched and painted illustration of a birdhouse.
The cover carries a proper elastic ribbon which is attached with the help of a metal buckle on the front.
This whole notebook set has been customised so that the person using it can relate to it and enjoy writing in it. The notebooks can be easily slid in and out of the cover for use.
I love creating customised notebooks for any occasion or purpose, so please feel free to drop me a message if you are interested.
Comment >>Happy Diwali greeting Cards


So Diwali was here this weekend and so was my small exhibition at Derby, UK! 🙂 It was the first time I ever participated in such an event, and I am extremely happy for the opportunity that the organizers of the event gave me. Diwali is the Festival of Lights in India, and it is the celebration of light over darkness, and a new beginning. So I decided to create some Diwali cards for the exhibition!
People in India usually exchange gifts and light ‘Diyas’ and candles to celebrate. These cards are made to suit the occasion, and I added some flowers and leaves (cut and modeled from paper) to add the extra flourishes.
The sentiment “Happy Diwali” has been brush-lettered using Tombow brush pen, on the base cardstock which is about 300 gsm in weight. To colour the background, I have used acrylics and inks.
Comment >>
Customised Notebooks with business card folder


Gunilla needed customised notebooks for her work, which would make it easier for her to store business cards at the same time. The idea was to create a mini business card folder inside the notebooks so that she could keep the cards there and use them whenever necessary.
The folder was created with paper, and sandwiched between two heavy cardstocks so that it would not make the notebook difficult to write on. I also did some watercolour illustrations on top of the notebooks, giving each of them a customised look. I created 14 notebooks in total, and each of them uses 90 gsm paper inside for writing and 300 gsm cardstock for the cover. The papers are completely acid and lignin proof.
Comment >>
Diwali giveaway!


So Diwali is just around the corner, and I decided this would be the right moment to say thank you to everyone for supporting me, and offer some exciting freebies handmade with love. 🙂 I am posting pictures of three new earrings that I made for this Giveaway, and this time we will have THREE winners! Plus, all participants will get an exclusive 10% discount if they order a customised gift for Diwali.
The rules to participate are:
- Share my Facebook page Design and Sketch
- In the comments of the blog post on my website or Facebook post, just mention if you want Earring 1, 2 or 3.
This offer will run for four days (till this Friday) and I will randomly pick three names as winners from the list of participants for the Diwali Giveaway! 🙂 I will then immediately ship the earrings. This Giveaway is open for all, irrespective of where you stay.


Happy Diwali greeting card


I made these cards as a concept for an enquiry made recently. The idea behind this greetings card is a simple one that focuses mostly on the basic sentiment. The sentiment “Happy Diwali” is uniquely designed, and printed in rose gold foil which shines as it catches the light. 🙂 The illustrations are water coloured, and a teal ribbon is attached to the bottom of the card for a more elegant look. I also shaped some gold polymer clay into tiny hearts which I then attached on top of the ribbon to make the card more personal and cute.
If you are interested in sending handcrafted cards to a lot of people for a festive occasion, I can design them for you in a manner that is customisable. Nothing can exceed the joy of receiving and giving something that is handmade and uniquely crafted. For customised greetings card, please contact me for more details. I can also recreate the design for a bulk order at a very affordable price!
Comment >>a little chaos necklace


Price: Rs. 1200 including delivery
Playing with clay is a lot of fun! This pendant carries a floret of red petals with leaves and some beads sprinkled on top. The piece is designed to be a bit random, with a chaotic bunch of flower petals representing the floral imagery in its abstract form.
The pendant is attached to a metal chain, and has a fastener on the end that can be easily locked into place. This whole piece has a unique design, and can be worn with any traditional or trendy garment.
If you want me to design a unique, customised necklace for you, please contact me.
Comment >>Wedding Card
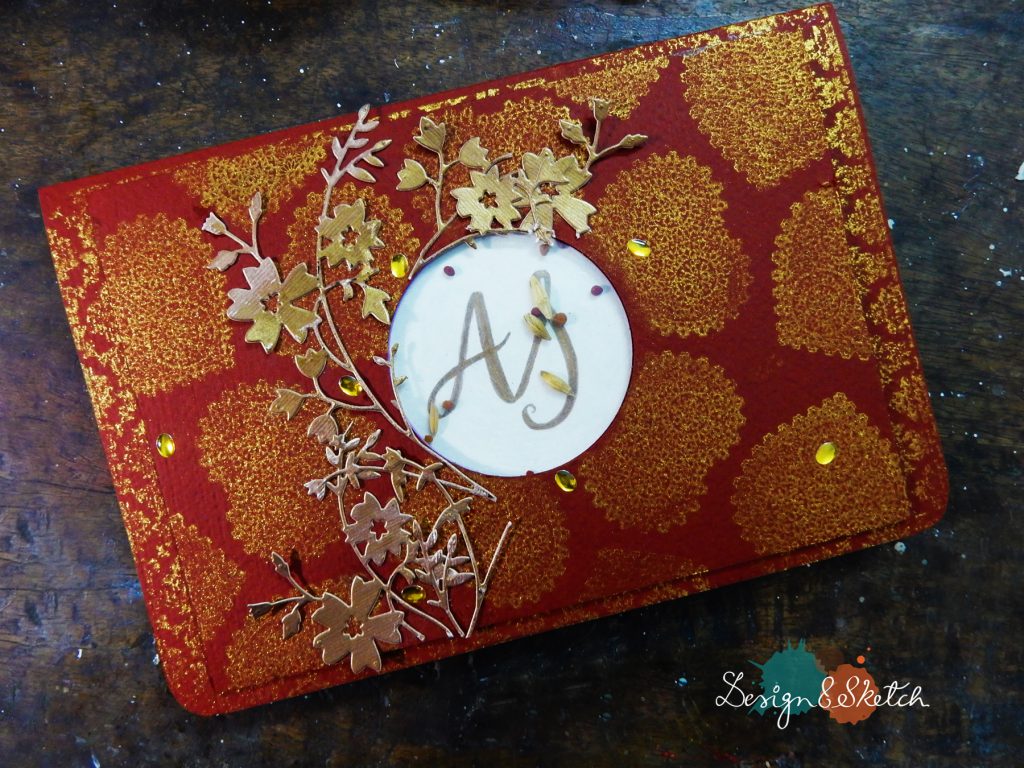
 This has been a very interesting project for me. Someone I have known for a very long time is getting married in the coming year, and she wanted me to design a special card for her ‘Tattya’. This is a special part of Indian marriage ceremony where the families of the bride and bridegroom arrange and decorate gifts for the couple. Suparba wanted to add a card that would go perfectly well with arranged gifts, and I designed one that would fit her requirements perfectly.
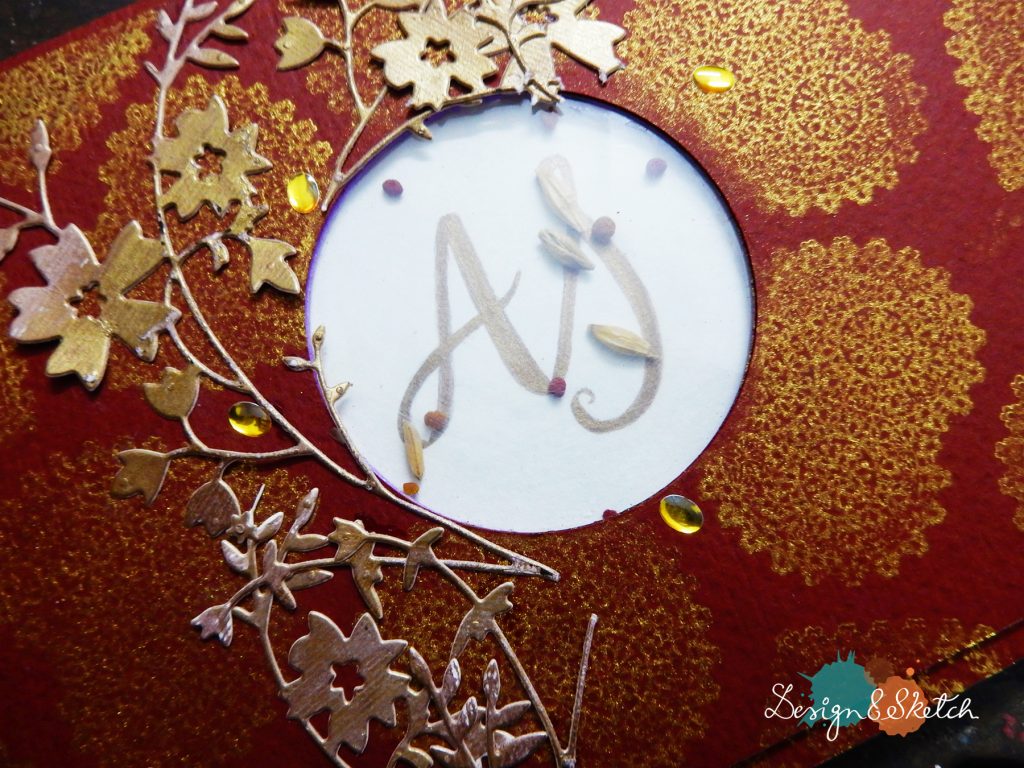
She wanted a card that is a bit unusual, with grains, halud (turmeric) and sindoor (vermillion) added to the card somehow. I decided to create a brush-lettered monogram in gold for the lovely couple, and I added the ingredients under the acetate cover so that they do not fall out.
I added some flowers that I painted in gold on the side, to create a more luxurious look that would suit the wedding occasion. For the cardstock I used red 280 gsm paper, which is strong and thick enough to not tear or bend easily.
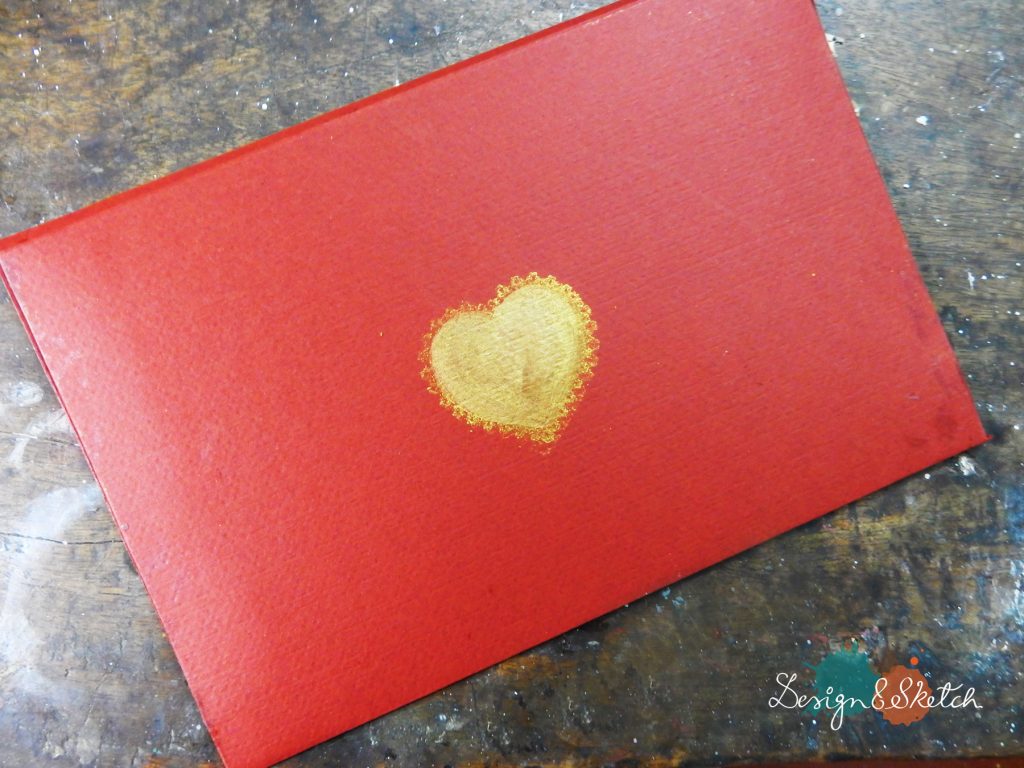
The card inside has been left blank so that the couple could write anything they wanted, thereby being able to personalise the message and meaning of the card even more. I also made a cover with a simple gold heart painting on the top.
I had been working on making wedding invitation cards recently, so Suparba’s request came at a very good time! 🙂 Plus, I had the honour of creating something unique that she could use for her wedding, and nothing can beat that feeling of making the bride-to-be truly happy!
If you want me to design a card for you (for any occasion), please feel free to contact me via this form.
Comment >>